TM 5-3805-296-23-6
0388
DISASSEMBLY CONTINUED
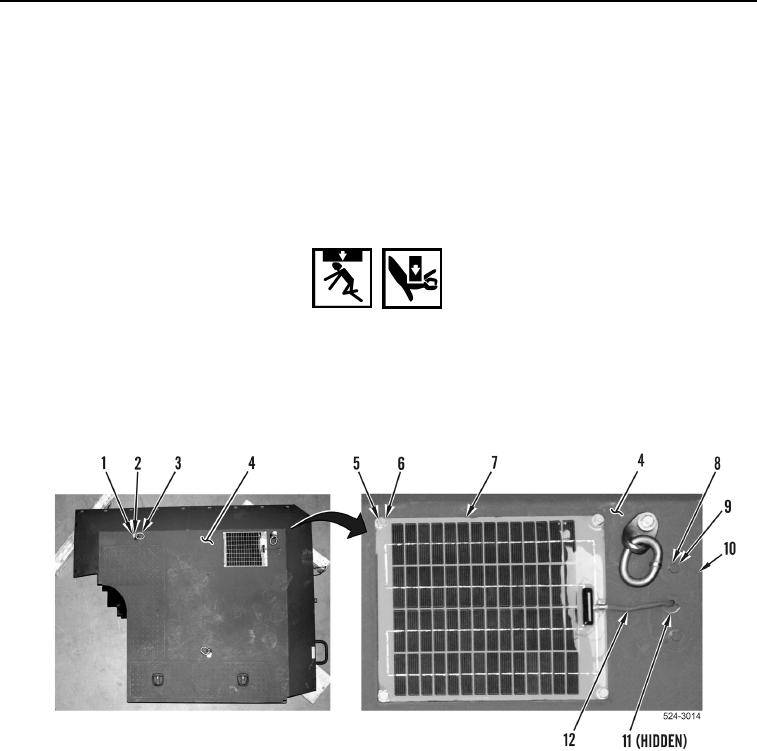
3. Remove four bolts (Figure 10, Item 5), washers (Figure 10, Item 6), and solar panel (Figure 10, Item 7) from
hood (Figure 10, Item 4).
4. Remove two bolts (Figure 10, Item 8), washers (Figure 10, Item 9), and plate (Figure 10, Item 10) from hood
(Figure 10, Item 4).
5. Remove solar panel cable (Figure 10, Item 12) and 24-volt pulse receptacle unit (Figure 10, Item 11) from hood
(Figure 10, Item 4).
6. Install three link brackets (Figure 10, Item 3), washers (Figure 10, Item 2), and bolts (Figure 10, Item 1) on
hood (Figure 10, Item 4).
WARNING
Use caution when removing hood. Use assistance during procedure. Keep clear of heavy
parts as they are lowered. Failure to follow this warning may result in injury or death to
personnel.
7. Install suitable lifting device on link brackets (Figure 10, Item 3).
8. Using lifting device and assistance, position hood (Figure 10, Item 4) topside down on blocks.
Figure 10. Link Brackets and Solargizer.
0388

