TM 9-4940-568-20
3-60
Materials/Parts
Adhesive (Item 4, Appendix C)
Adhesive-Sealant (Item 3, Appendix C)
Alcohol (Item 6, Appendix C)
Heat Shrink Tubing (Item 22, Appendix C)
Solder (Item 36, Appendix C)
This task covers:
a. Solderless Terminal Removal
b. Wire Splicing Using Butt Connectors
c. Wire Splicing Using Solder Method
d. Deutsch Connector (Plug or Receptacle) Repair or Replacement
e. Cannon Connector (Plug or Receptacle) Repair or Replacement
f. Type II Connector Repair or Replacement
g. Hirschman Connector Repair or Replacement
INITIAL SETUP
Equipment Condition
FRS unloaded, (TM 9-3990-361-10)
Tools and Special Tools
Tool Kit, General Mechanic’s: Automotive
(Item 30, Appendix G)
Deutsch Crimping Tool, (Item 5, Appendix G)
Extraction Tool (Item 12, Appendix G)
Terminal Remover, Weatherpac
(Item 26, Appendix G)
Weather Pack Crimper (Item 32, Appendix G)
3-16. WIRING HARNESS MAINTENANCE.
a.
Solderless Terminal Removal.
Terminals come in different
styles and sizes. To prevent
equipment damage, be sure to use
only the exact replacements. Do
not attempt to modify terminal to
fit.
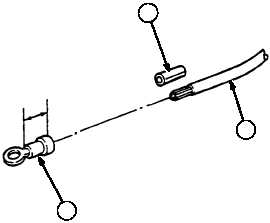
(1)
Remove old terminal (1) and trim end of
wire (2) as needed to make an undamaged
end.
NOTE
If trimming causes wire to
become too short, refer to
splicing sections (b and c) of this
paragraph.
(2)
Remove insulation (3) from end of wire (2)
equal to the length of dimension A.
(3)
Install new terminal (1) over bare end of
wire (2). Make sure all strands of wire (2)
are inside of terminal (1).
(4)
Crimp new terminal (1) firmly in place.
2
3
1
A


