
TM 5-3805-296-23-4
0266
REMOVAL CONTINUED
NOTE
Note location of P-clamps to aid in installation.
Note routing of wiring harness to aid in installation.
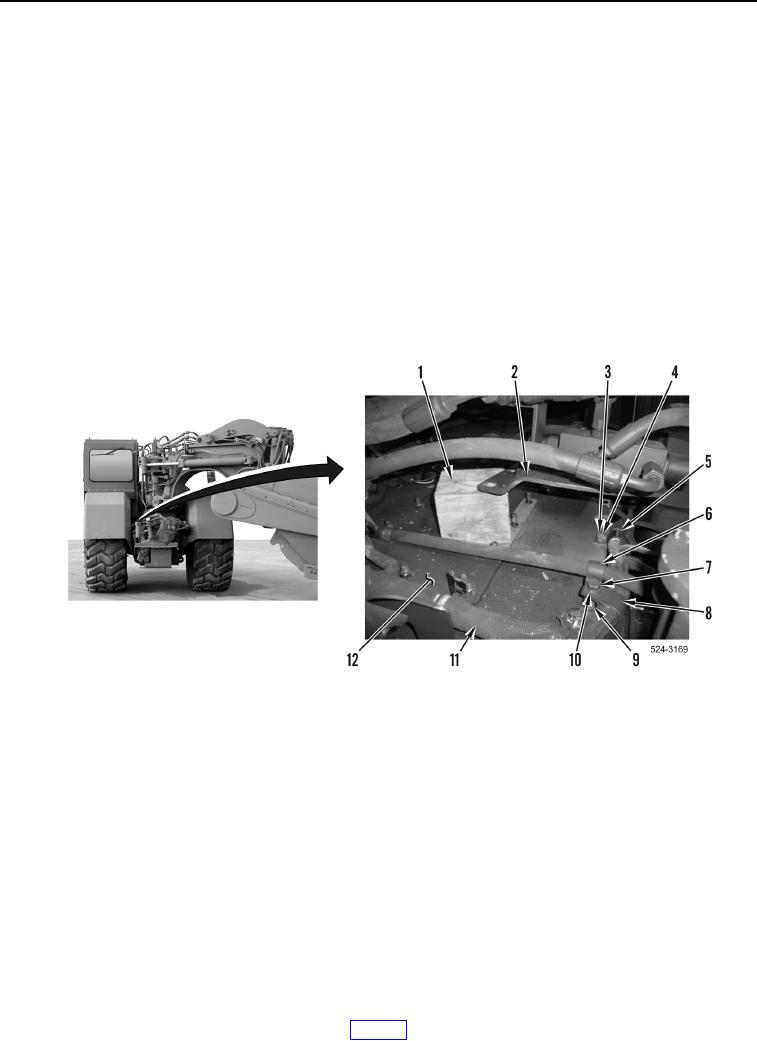
45. Position cribbing (Figure 17, Item 1) under bracket assembly (Figure 17, Item 2).
46. Remove bolt (Figure 17, Item 3), washer (Figure 17, Item 4), and P-clamp (Figure 17, Item 5) from
transmission (Figure 17, Item 12).
47. Remove P-clamp (Figure 17, Item 5) from transmission wiring harness (Figure 17, Item 11).
48. Remove bolt (Figure 17, Item 7), washer (Figure 17, Item 10), P-clamp (Figure 17, Item 6), P-clamp
(Figure 17, Item 8), and spacer (Figure 17, Item 9) from transmission (Figure 17, Item 12).
49. Remove P-clamp (Figure 17, Item 8) from transmission wiring harness (Figure 17, Item 11).
50. Remove transmission wiring harness (Figure 17, Item 11) from machine.
51. Remove cribbing (Figure 17, Item 1) from transmission (Figure 17, Item 12).
Figure 17. Cribbing Under Bracket.
0266
END OF TASK
CLEANING AND INSPECTION
000266
1. Clean and inspect all components IAW Mechanical General Maintenance Instructions (WP 0539).
2. Clean and inspect all components IAW Electrical General Maintenance Instructions (WP 0540).
END OF TASK