TM 5-3805-296-23-5
0336
REMOVAL CONTINUED
NOTE
Note location of P-clamp to aid in installation.
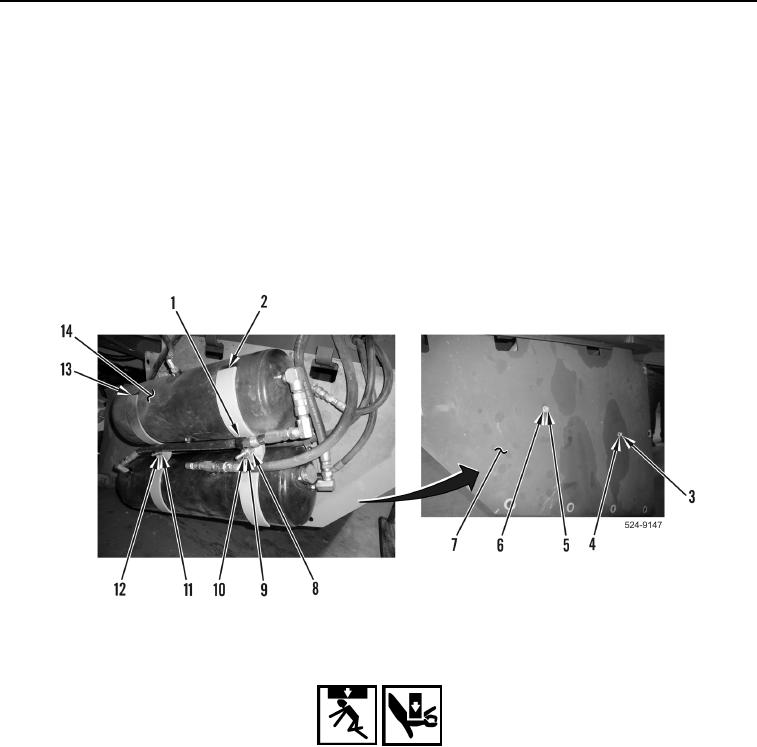
4. Using assistance, remove nut (Figure 3, Item 10), washer (Figure 3, Item 9), P-clamp (Figure 3, Item 1), spacer
(Figure 3, Item 8), clamp (Figure 3, Item 2), bolt (Figure 3, Item 5), and washer (Figure 3, Item 6) from air tank
access plate (Figure 3, Item 7).
5. Using assistance, remove bolt (Figure 3, Item 12), washer (Figure 3, Item 11), clamp (Figure 3, Item 13), air
tanks (Figure 3, Item 14), bolt (Figure 3, Item 3), and washer (Figure 3, Item 4) from access plate
(Figure 3, Item 7).
6. Position air tanks (Figure 3, Item 14) aside.
Figure 3. Air Tanks and Mounting Bolts.
0336
WARNING
Use caution when removing air tank access plate. Air tank access plate may move
unexpectedly and swing down. Use assistance during procedure. Keep clear of heavy
parts as they are lowered. Failure to follow this warning may result in injury or death to
personnel.

