TM 1-1740-204-13&P
4-14.2
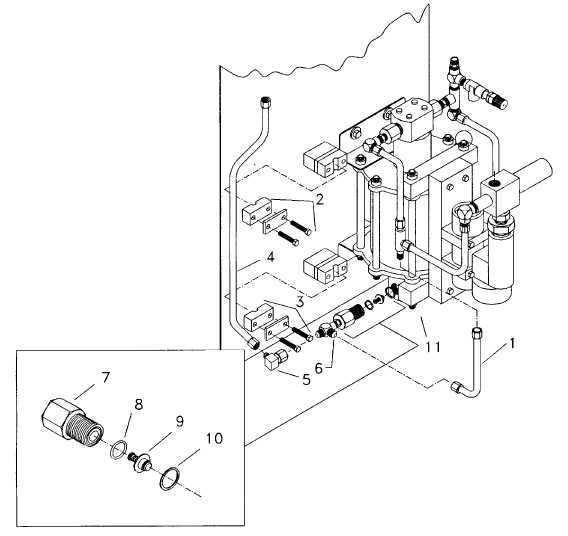
LOWER INLET CHECK VALVE
a.
Loosen the flare fittings of tubing (1) and remove the tubing.
b.
Loosen the bolts of bracket assemblies (2 and 3). Loosen the lower flare fitting of tubing (4) and the flare
fitting of elbow (5). Remove elbow (5) from T-fitting (6).
c.
With an adjustable wrench, remove the lower inlet check valve body (7) with T-fitting (6) attached.
d.
Refer to the inset illustration for the inlet check valve. Carefully remove the O-ring (8) from the groove in the
check valve body (7). Remove check valve assembly (9).
e.
Remove the flat O-ring (10) from inside the check valve cavity of the pump body (11).
f.
Examine all rubber parts for contamination, nicks, cuts and abrasions. If necessary, replace all components
with repair kit components. Refer to Appendix C -RPSTL for kit part numbers.
GO TO NEXT PAGE
4-9